Author: Mr Glass

What to Look For When Buying New Windows For Your Home

house windows

If you’re buying new windows for your home, there are several things you need to know to make sure you end up with a high-quality window.

For instance, you’ll need to consider the type of frame material. This can range from composites to vinyl to fiberglass.

There are other considerations. Let’s take a look!

Fiberglass

Fiberglass windows are an effective way to add beauty and value to your home. They can also help keep your house warm in the winter and cool in the summer. You can choose from a variety of styles and shapes. The material is also durable. Unlike wood, it will not warp, rot, or corrode. It is a great choice for coastal homes.

Fiberglass is also one of the best insulation materials. It holds up to high levels of humidity and is also resistant to environmental damage. For added energy efficiency, you can opt for double-paned or triple-paned windows.

The fibers used in fiberglass windows are woven into a resin injector. This ensures a tight fit. Also, the glass fibers are thinner than in a traditional window.

Vinyl

Among many residential window options, Vinyl windows have become a popular choice for homeowners. They offer a variety of benefits and can help reduce the cost of heating and cooling your home. You can choose from a wide range of styles and colors, as well as different glass types.

Choosing vinyl windows for your home can be an easy decision. It is a durable material that holds up to the weather and requires little maintenance. However, it is important to look for a reputable manufacturer.

Unlike wood, vinyl is an incredibly energy-efficient material. If your new windows are Energy Star rated, you can save money on your utility bills.

Vinyl can also add value to your home. Unlike wooden windows, it is resistant to staining and will not chip, peel or warp. That means you will not have to replace your windows every few years.

Composite

Composite windows are a durable, affordable, and energy-efficient alternative to traditional wood and vinyl windows. These types of windows can improve the look and value of your home, and are available in various styles and colors.

A composite window is made from a combination of timber, aluminum, and other materials. The frame and interior are built with the strength and durability of the material and are factory-finished. This gives them an appearance that mimics that of a wooden window. They can come in a range of styles and colors, making them ideal for both traditional and contemporary homes.

These kinds of windows are highly insulated. Because they are made from recycled materials, they are a green alternative to vinyl and wood windows. It’s also easy to maintain. They won’t rot or warp and can last for up to 40 years.

Related: How to choose the best replacement window contractor

Wood-clad

Wood-clad windows are an excellent way to add value and comfort to your home. Not only are they beautiful, but they offer added benefits like increased energy efficiency and durability. They are also less expensive than vinyl.

When deciding which type of window to purchase, it is important to consider your budget and your needs. Vinyl is the most affordable option, but it does not last as long as wood. For homeowners who want a traditional look for their windows, vinyl is a good choice.

Aluminum is another popular cladding material. It is easy to maintain and has a sturdy exterior. However, it can be more expensive than fiberglass or vinyl.

When choosing a window, you need to consider how much maintenance you will need to perform on it. Most vinyl and aluminum-clad windows are low-maintenance, but you still need to take care of the interior to prevent rot.

Double-pane

If you want to save on energy costs while improving the look and feel of your home, double-pane windows are the way to go. They provide a lot of benefits from improved insulation to a reduction in noise. These windows can also enhance your home’s value if installed by licensed professionals.

You can get double-pane windows in a variety of styles, materials, and designs. The best choice is dependent on your personal preferences, budget, and location. Some areas are better suited for certain types of windows than others. Depending on your needs, you can choose from vinyl, fiberglass, or aluminum frames.

Double-pane windows are made of two panes of glass separated by a spacer. The empty space between the two panes serves as an insulating barrier. This translates to less heat loss during the winter and a lower heating bill during the summer.

How to repair damaged drywall around a window

Drywall is commonly used for interior walls in houses and buildings. Installation is easy, the material can be textured in many ways, and is a solid surface for both wallpaper and paint. The only problem is that drywall easily attains scratches, holes, water damage and other dings.

If a piece of drywall around a window — or anywhere on a wall, for that matter — needs repair, the most effective method is to cut out and replace the drywall that has been damaged. If the damage done is only a tiny hole, that can be spackled.

10 steps for best results

Follow our guide to repair your drywall:

  1. First, loosen and remove the damaged drywall from around the window that needs to be fixed. Knock out a small piece of drywall to make a tiny hole in the area that has been damaged.
  2. Second, put a keyhole saw blade into the hole. Make back-and-forth cuts that are shallow and to the right until you connect with the stud on the right side of the hole. Be careful not to cut into the stud. Do this to the left of the hole as well until you hit the stud on that side.
  3. Third, take the keyhole saw out of the wall. Move the blade’s teeth so they point down to the floor. Position the saw perpendicular to the wall at the cut’s left end. Hit the handle’s end with your hand to insert the saw into the drywall. Saw down through the drywall by the edge of the stud until you have moved beyond the area of damage by about five inches. Move back to the horizontal line and then cut up until clearing the damage by approximately five inches. Also complete this step by the right-side stud, equaling the length of the cut above and below the horizontal line.
  4. Fourth, make a cut straight across the top of the damaged area starting at the top of the left cut and moving to the top of the right cut. Remove the now loose drywall piece. Move to the bottom of the damaged area and cut across between the lower end of the two vertical cuts. Remove the last piece of material that is damaged. You should be left with an opening that is rectangular and with four square corners. Using the keyhole saw, clean out the cuts that aren’t straight and square up the corners.
  5. Fifth, use a measuring tape to determine the distance between the exposed studs. Cut two pieces of one-by-two lumber to that exact length. Place one of the boards horizontally flat along the inside, bottom edge of the opening. Now, half the width of the board should be behind the drywall while the other half protrudes up inside the opening. Place a screw every four to six inches through the drywall to secure the board to the drywall just under the bottom of the hole. Do this again at the top of the hole with a second board.
  6. Sixth, get you tape measure back out to find the distance between the boards. Trim two more pieces of one-by-two lumber to this length. Place one of the boards flat against the stud to the hole’s left. Ensure that the front edge of the board is even with the stud’s front. Screw it to the stud at every six to eight inches with 2-inch wooded screws. In the same exact way, attach another one-by-two board to the stud’s right side.
  7. Seventh, measure the height and width of the drywall opening. With a drywall saw, trim a new piece of drywall to match the dimensions. Place the fresh piece of drywall into the opening tightly against the boards you installed in earlier steps. Using a drywall screw every four inches or so around the outside, attach the drywall to the four boards.
  8. Eight, use a coat of joint compound in the areas surrounding the drywall patch. Trim and position joint tape over each joint. Paint on another layer of joint compound. Allow the compound to dry for 24-30 hours. Sand it lightly until it is smooth.
  9. Ninth, add on one more layer of joint compound approximately four inches wider than the first sanded layer. When the layer dries, sand it and apply a third layer of compound and one last sanding.
  10. Finally, when the drywall patch around the window is finished, apply the same type of texture on the wall to the patch and areas surrounding. Give the texture time to completely dry. Add two coats of primer, then paint with the same color already on the wall. If needed, put on a second coat.

If you don’t feel comfortable make the repair on your own, call upon the assistance of your local drywall contractors in Erie, PA.

How To Repair A Windshield Crack Or Chip

windshield cracked

A windshield chip or crack happens when a small object or rock impacts it, which causes a small damaged area. It frequently occurs when tires of some vehicles fling debris behind them. There are times that small rocks may fall out of the dump trucks or some vehicles. A chip can be very small spot that’s barely noticeable. However, some people know when they happen due to the impact or loud sound.

Why You Should Repair a Windshield Crack or Chip Immediately?

Even if the damage is minor, it’s essential to repair windshield chip at the soonest time possible. If debris and dirt are embedded in the chip’s area, it’ll make the repairs impossible or less effective. Windshield wipers and weather may force dirt to the chip. In fact, even the windshield washer fluid that contains dyes may discolor the area. If repair is done, the result won’t be as clean and smooth as it could’ve been. But rather, the repair’s area will have a dirty or cloudy look since the resin would seal in that debris.

For best windshield chip repair, in which windshield is left clear and smooth, the repair must be done within several days after the damage happens. A chip may burst into patterns of small cracks or grow into a long crack. If you didn’t repair windshield chips, it can be a bigger problem. If windshield chip is fixed properly and quickly, you will be able to avoid expensive repair and the factory seal around your windshield will be left intact. It’s important to take note when windshield chip happens near the windshield’s outside edge. If the resulting crack is very close to the edge, it might not be repairable. In other states, vehicles with big crack or several windshield chips may not pass inspection.

It’s likely the crack will get bigger if left without repair. In time, you may require roadside assistance if it obstructs your view of the roadway during travel.

Best Ways to Repair a Windshield Crack or Chip

The process in repairing a chip is typically simple and quick. It may be performed by majority of windshield repair experts.

First and foremost, the windshield technician would inspect windshields to ensure this kind of repair is best and right for the situation. The assessment basically involves investigating the type and size of the chip and the amount of embedded debris in the damaged area.  Then, the technician will clean the chip’s area. No debris or moisture is sealed to the repaired spot. If there’s significant debris in chipped spot, the repair would result to cloudy spot on the windshield. It may be a problem once the chip is in the line of sight of the driver.

Using a special resin material, the chip is sealed. It will be hardened by the UV light and the resin dries clearly and would blend with the glass of the windshield. Any resin would be removed so the smooth surface of the windshield is maintained.

The whole process takes only about 30 minutes and the customer is left with the windshield that performs and looks as good as new.

Avoiding Windshield Chips or Cracks

Chips may be avoided through maintaining a safe distance from the dump trucks and some similar vehicles that haul debris and dirt. Observing proper space cushion behind some cars may also help the drivers avoid objects and rocks that are flung to the air by tires. Thus, sometimes this kind of damage is unavoidable. Once it happens, placing a clear packing tape to the chip would keep the water and debris out on the damaged spot, which makes it more likely that windshield may be fixed.

A windshield chip or crack happens when a small object or rock impacts it, which causes a small damaged area. It frequently occurs when tires of some vehicles fling debris behind them. There are times that small rocks may fall out of the dump trucks or some vehicles. A chip can be very small spot that’s barely noticeable. However, some people know when they happen due to the impact or loud sound.

Why You Should Repair a Windshield Crack or Chip Immediately?

Even if the damage is minor, it’s essential to repair windshield chip at the soonest time possible. If debris and dirt are embedded in the chip’s area, it’ll make the repairs impossible or less effective. Windshield wipers and weather may force dirt to the chip. In fact, even the windshield washer fluid that contains dyes may discolor the area. If repair is done, the result won’t be as clean and smooth as it could’ve been. But rather, the repair’s area will have a dirty or cloudy look since the resin would seal in that debris.

For best windshield chip repair, in which windshield is left clear and smooth, the repair must be done within several days after the damage happens. A chip may burst into patterns of small cracks or grow into a long crack. If you didn’t repair windshield chips, it can be a bigger problem. If windshield chip is fixed properly and quickly, you will be able to avoid expensive repair and the factory seal around your windshield will be left intact. It’s important to take note when windshield chip happens near the windshield’s outside edge. If the resulting crack is very close to the edge, it might not be repairable. In other states, vehicles with big crack or several windshield chips may not pass inspection.

Best Ways to Repair a Windshield Crack or Chip

The process in repairing a chip is typically simple and quick. It may be performed by majority of windshield repair experts.

First and foremost, the windshield technician would inspect windshields to ensure this kind of repair is best and right for the situation. The assessment basically involves investigating the type and size of the chip and the amount of embedded debris in the damaged area.  Then, the technician will clean the chip’s area. No debris or moisture is sealed to the repaired spot. If there’s significant debris in chipped spot, the repair would result to cloudy spot on the windshield. It may be a problem once the chip is in the line of sight of the driver.

Using a special resin material, the chip is sealed. It will be hardened by the UV light and the resin dries clearly and would blend with the glass of the windshield. Any resin would be removed so the smooth surface of the windshield is maintained.

The whole process takes only about 30 minutes and the customer is left with the windshield that performs and looks as good as new.

Avoiding Windshield Chips or Cracks

Chips may be avoided through maintaining a safe distance from the dump trucks and some similar vehicles that haul debris and dirt. Observing proper space cushion behind some cars may also help the drivers avoid objects and rocks that are flung to the air by tires. Thus, sometimes this kind of damage is unavoidable. Once it happens, placing a clear packing tape to the chip would keep the water and debris out on the damaged spot, which makes it more likely that windshield may be fixed.

If you cannot drive safely with a cracked windshield, call for towing help in Missouri City, Texas.

What Causes Basement Windows to Leak and How to Fix Them

basement window repair

Are your basement windows leaky?

Thanks to basement windows, your basement gets its much needed dose of natural daylight. When there is no power, even a tiny hopper window can give enough light to help you locate the litter box, photo albums, or circuit breaker. Having functional and clean windows is always safer and brighter.

Sadly, your basement windows can get dark, dirty, and rusty over time. Once this happens, your basement windows lose their purpose. The worse thing about weakening basement windows is that they can leak, allowing chilly air inside during cold months.

What causes basement windows to leak and how do you fix them?

Decayed and Rotten Windows

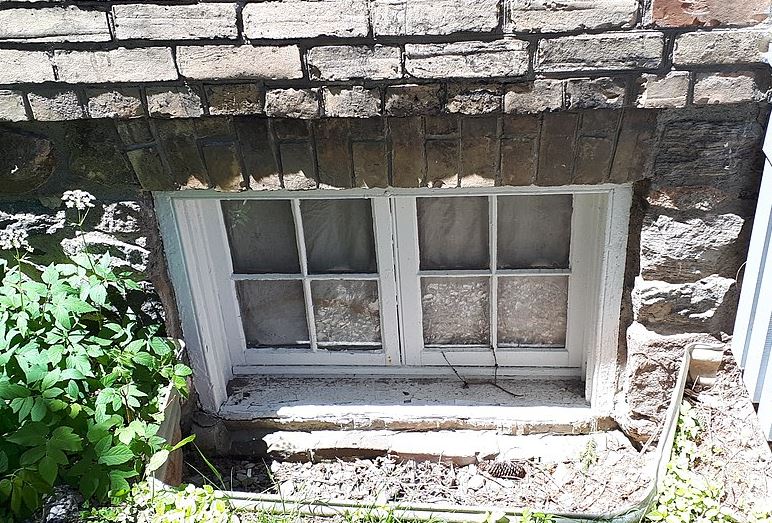
If you notice water seeping through the edges or corners of the basement window, obviously, the windows themselves are the problem here. Steel and wood basement windows tend to rot and decay over time and this can lead to water intrusion.

To solve this issue, consider replacing your outdated basement windows with something more resistant to water. There are now waterproof basement windows with seals that don’t decay right away when it gets into contact with the different elements. Once installed properly, these windows can also stop air leaks, improving the energy efficiency of your basement.

Uncovered or Old Window Well

Old-fashioned window wells used to be made to allow the highest amount of daylight to enter basements. If left uncovered, these wells will quickly fill up with leaves, debris, and dirt. Melting water, rainfall, and water from the ground can accumulate in these wells, finding their way into your basement.

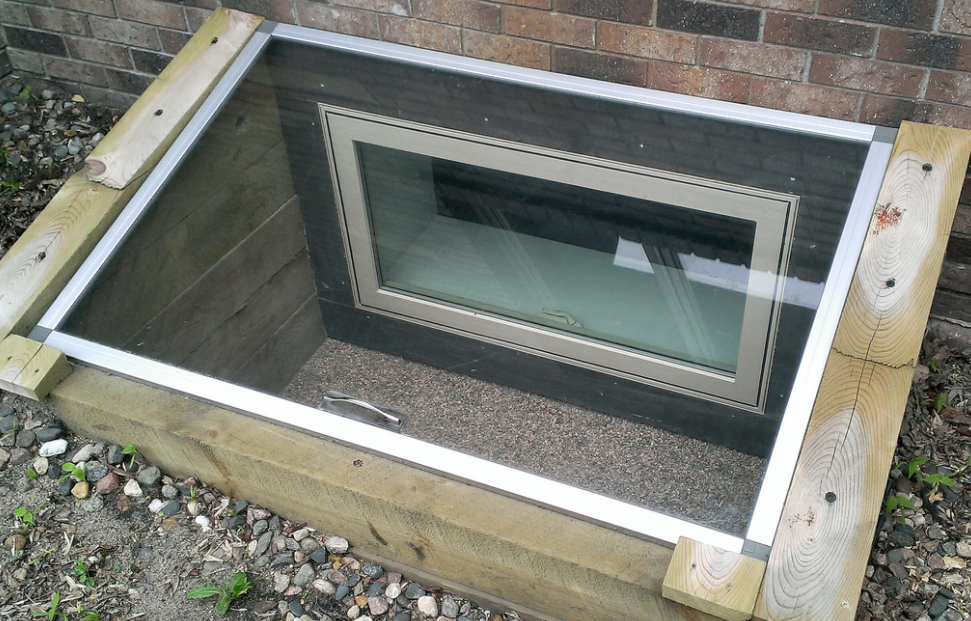
Fix this issue by covering your window wells with weatherproof covers. Look for window wells that won’t decay once they get in contact with the elements and wet dirt. You can also use a clear cover that can keep the water and debris out while still allowing light to stream into your basement. There are covers with bright reflective surface designed for bouncing sunlight to the basement. This cover can also serve as a buffer against cold winds during winter, thus making the basement much more energy efficient as a result.

Improper Drainage

Don’t forget that your basement is not a submarine. You cannot completely seal off all the water, particularly when your foundation is surrounded by improper drainage and poorly graded yard. Good thing there are several steps you can take that can help relieve hydrostatic pressure that can naturally occur from water in surrounding soils.

  • Always keep the gutters clean and in proper working condition. If you don’t have them yet, it is time to install them right away.
  • See to it that the terrain has been properly graded and will slope away from your home’s foundation.
  • Make sure that water is indeed coming in through the windows and not another spot in the foundation that would require basement crack repairs.
  • Prevent the downspouts from pouring the water near the foundation walls. Try to extend them as far as you can away from your house.
  • Check that the foundation drainage is still in great condition. An internal perimeter drainage is recommended and combine this with a quality sump pump.

For expert installation of new basement windows contact foundation repairs service in Canton, Ohio.

How to repair a broken window on your own

Ever get so frustrated that you punched a window and broke it in few hundred pieces? Perhaps after the Pats lost the Super Bowl to Giants?

Or those pesky neighbor kids, who are always playing ball and horsing around in the backyard? Have they smashed one of your windows with their antics?

If so, you know that window repair and replacement can be expensive. The good news is you can do it one your own.

In most cases, you’ll have to take the window out of its frame and use a work bench or other area to make the repair.

Here’s what you’ll need:

A piece of glass to replace the broken one (make sure you get the right size)

  • Glazier’s Points
  • Window glazing
  • Propane torch
  • Glazing tool
  • Joint knife
  • Pliers
  • Screwdriver
  • Hammer
  • Safety glasses

Ready to get started? Watch the video below to become an expert at window repair.

Remember, if you don’t feel comfortable or safe make the repair on your own, call upon an expert near you.

What to look for when buying egress windows

foundation windowEgress windows are emergency windows or openings large enough to allow people to easily exit the space, and for rescue crews to gain access in case of fire or other emergency. Adding an egress window is essential any time you remodel your basement to make a new bedroom, office or other living space.

The crucial factor while buying egress windows is the size or dimensions. An egress window must satisfy all four International Residential Code (IRC) criteria:

  1. Minimum width of opening: 20 in.
  2. Minimum height of opening: 24 in.
  3. Minimum net clear opening: 5.7 sq. ft. (5.0 sq. ft. for ground floor). Net clear opening refers to space that exists when the window is open.

Contact a Syracuse, NY foundation repair contractor for professional assistance when installing egress windows.

There are more important points to remember while setting an egress window.

  • Provide 9 sq. ft. of “floor area,” with a minimum dimension of 36 in. in width and in length.
  • Basement egress windows have special requirements. Since you’re below ground, you have to make sure that the window can still fully open without obstruction.
  • The window should be operational from inside without using any keys.

There are various types of windows which can be used according to your needs. Some of them are:

  • Casement Windows:These are the ideal basement egress windows. These windows take very little space. These are side- hinged windows and can be easily operated in case of any emergency. The hinged sashes swing free and clear of the opening. The disadvantage of using casement windows is that it allows less light into the basement. This can be fixed using double casement windows.
  • Glider Windows: These windows have to be big as even when they are open, the glass on the windows takes substantial amount of space. The size should be at least 4 ft. wide and 4 ft. high. Hence, these windows are suitable if you have enough free space.
  • Awning windows: These are top- hinged windows and the opening sash impedes entrance and exit. These windows are not very encouraged as their opening hardware and hinges are centered in the middle and can block an easy escape.
  • Double hung windows: These windows have two overlapping sashes. They overlap in the middle of the window with the bottom sash sliding upward in order to open the window. The bottom pane must be at least 24 inches and 34 inches side to side. They site vertically on the wall, which might not look as good as a horizontal slider.

On average, homeowners report the cost to install egress windows to be $2,218, with $400 being the lowest and $4,900 being the highest reported cost.

Keeping all these marks in mind, you should choose the best option according to your need and the overall space available.

Auto Glass Self-Installation Guide

Self-installation can be an excellent way to save money while adding value to your property, and it’s surprisingly easy as long as you go about it in the right way. Whether you’re an experienced contractor professional or just someone who enjoys taking on projects involving your own home (beginner).

Tips on doing Glass Installation at Home

1: measure the piece of glass you need and know the make, model, and year of your vehicle so that you purchase the correct replacement part.

2: If the rear view mirror is still in place on the old piece of windshield remove it at this time.

3: Remove the existing glass. Remove the old gasket that was holding the glass in place at this stage.

4: Carefully clean the area where the new glass is going to be installed. Clean the surface with a non-oily
cleaner to remove any old adhesive or gasket material.

5: With the help of a friend place the new gasket in position on the automobile.

6: Carefully place the piece of glass into the new gasket you have installed. Some gaskets are designed to be put on the glass before
installation, and some of them go on the car first. Follow manufacturer’s instructions to make certain you are placing the gasket on the proper part first.

7: Use the recommended adhesive to secure the new glass in place. Go all of the way around the windshield applying adhesive to form a strong water proof barrier.

8: After the adhesive has the proper amount of healing time use a sharp knife or razor blade to carefully remove any excess adhesive or caulking from around the windshield.

9: Install the rear view mirror on the interior of the car using approved adhesives.

In conclusion, be sure and dispose of the old window and gasket
material safely. It is best if you package this debris in a cardboard container
before you set it out for the garbage collectors to pick up.